Offered without warranty or guarantee!
If you are unfamiliar with the terminology used to describe the parts of a pipe, you may find it to your advantage to review my Anatomy of a the pipe page before and/or during cleaning your pipe. One of the great advantages of the pipe is that it is made of a plastic shell with a bowl liner of pyrolytic graphite. This means that, unlike briar pipes, it is indifferent to water. The advertising says that it can be put in a dishwasher for cleaning. I have never tried this, preferring a more thorough yet gentle cleaning method. If you have a the pipe that you purchased used or if you have been careless running a pipe cleaner through the pipe and wiping out the bowl with a paper towel after each smoke, you may need to take firmer measures to restore its original smoking properties.
WARNING: These procedures may ruin any pipe other than those marked the pipe, THE SMOKE, or Venturi!
For pipes made of other materials, look elsewhere!


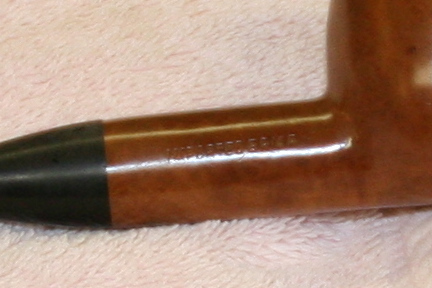
IMPORTANT: Do not immerse a the pipe with "IMPORTED BRIAR" stamped on the shank opposite the pipe marque and, instead of car wax, use carnuba wax when you get to that point. (If your the pipe looks like it is wood, but is not marked "IMPORTED BRIAR" it is one of the equally uncommon Rare Woods pipes which were plasticized and may be safely soaked and waxed.)
WARNING: Do not disassemble the pipe!
These pipes are old and can be very fragile where the tenon fits the mortise. It is best not to disassemble the pipe until you have waxed the bowl and still are not getting a good draw. Great care must be taken not to break the mouthpiece or split the shank.
The first steps will be necessary; we can only hope that those requiring separating the mouthpiece from the stummel will not. I cannot over-emphasize the importance of going through this carefully before you begin work. Smoke the pipe while you read this to soften the cake somewhat which may accelerate the process. (If you are concerned about sterilizing the pipe before smoking it, run a pipe cleaner soaked in rubbing alcohol through the mouthpiece first. Do not yield to the temptation to soak the mouthpiece in alcohol, it may discolor and damage it.) Let the pipe cool a bit before submerging it; the cake should be warm, but the pipe should be cool enough to handle comfortably.
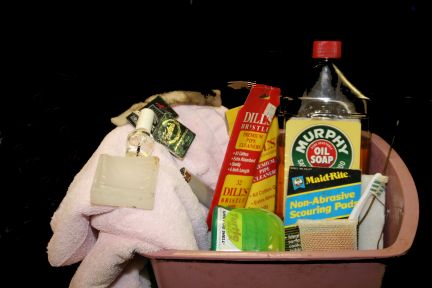
You will need a small dishpan, a non-detergent liquid soap, an old toothbrush and/or a non-scratch scouring pad, a lot of pipe cleaners (both regular and bristle), maybe a straightened #2 paper clip, an old bath towel, and some car wax. If you have a problem pipe, you may need the bottom piece of a wire clothes hangar, some matches or a lighter, 000 or finer sandpaper, paraffin and clear finger-nail polish.
The scrubbing process can be messy, splattering tobacco residue widely. I recommend placing the dishpan in a utility (laundry) tub and wearing a shop apron if you don’t want to decorate the walls and ruin your clothes.
Now to work.
Put on your shop apron and place the dishpan in the laundry tub.
1. Fill the dishpan with just enough hot water to submerge the pipe. Add a cap-full of a gentle soap. (I use Murphy's Oil Soap but any will do. Don't use a dish-washing detergent such as Dawn or Joy; sometimes they fade the paint.)
2. Place your pipe in the dishpan to let it soak only until the cake softens. (It is best to do this with the pipe assembled so the fit of the mouthpiece into the shank is not spoiled. It will also allow the stem to be used as a handle for the next step.) Do NOT allow the pipe to soak too long, it may fade the paint! The cake should be softened in a matter of ten to fifteen minutes.
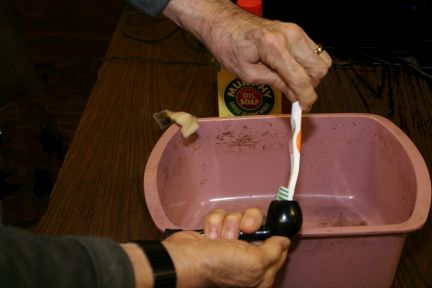
3. Use an old toothbrush and/or no-scratch scouring pad such as Scotch-Brite to scrub away any cake build-up in the bowl. If the cake does not remove easily, just keep at it with the toothbrush and no-scratch scouring pad.
DO NOT SCRAPE THE BOWL OUT WITH ANYTHING, ESPECIALLY ANYTHING METAL! If you do, you run a great risk of damaging the bowl liner. Should you discover that the bowl liner has already been damaged by improper cleaning, contact me. There is no way I know of to repair damaged pyrolytic graphite, but there is damage and then there is DAMAGE. Compare your bowl liner to these.


If yours is in even worse condition, I will be happy to evaluate it and give an opinion as to whether or not your the pipe retains its unique smoking properties. Usually I can do this from your description and/or a photo of the type and extent of damage.)
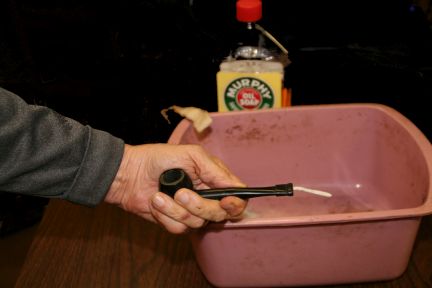
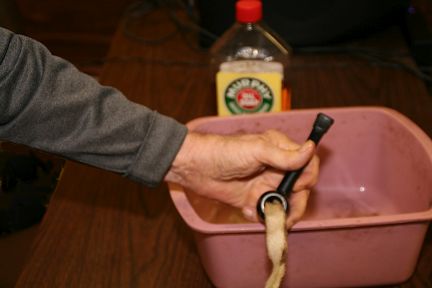
4. Run a bristle type pipe cleaner repeatedly through the airhole until it moves freely back and forth. Then use as many regular type pipe cleaners as necessary until one comes out clean.
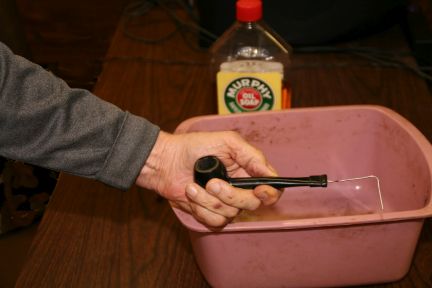
5. If there is a severe blockage in the airhole, use a straightened #2 paper clip to punch it out, being careful not to ram the side of the bowl liner across from the airhole entrance into the bowl. If this does not clear the airhole wait until after you have dried and polished the stummel to work on it some more.
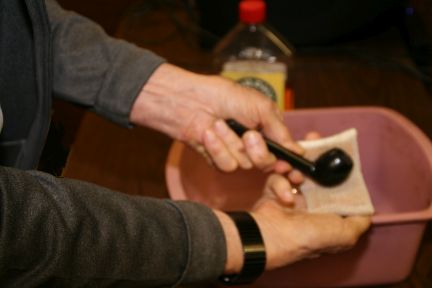
6. Rinse thoroughly while gently cleaning the shell with a no-scratch scouring pad. It is sometimes difficult to tell the difference between paint damage and dirt, be careful to not enlarge any areas of paint damage.
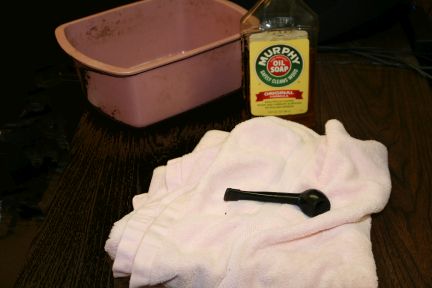
7. Dry with an old bath towel.
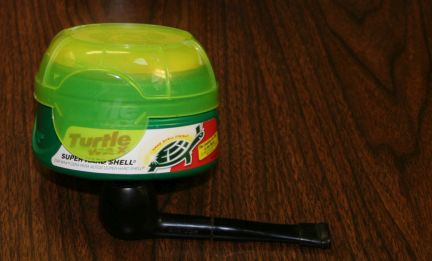
8. Apply a light coating of car wax (I use Turtle Wax, but any good brand will do nicely) to the outside surfaces, following the directions on the can.
9. If the pipe still does not draw freely, disassemble the pipe after it has thoroughly cooled and make many passes with pipe cleaners and paper clip until it does. Patience is the key here. Again, disassemble the pipe reluctantly; removing the mouthpiece from the shank is fraught with peril. But, if you must, you must. Remove the mouthpiece only when the pipe is cool. Grasp the stummel of the pipe firmly in one hand and the mouthpiece firmly in the other. Gently but firmly, pull apart straight while rotating the mouthpiece clockwise and the stummel counter-clockwise. If the mouthpiece just won't budge and you fear breaking something, a briar smoker's old trick is worth a try—place the pipe in the freezer and try again after a couple of hours. To reassemble the pipe, reverse the procedure, again being careful to push the tenon straight into the mortise while turning the stummel and mouthpiece in opposite directions.
10. As a last resort, and only if you are resigned to replacing the mouthpiece; if the mouthpiece has been crushed so much as to restrict air flow or if the blockage in the airhole simply will not budge, cut the straight bottom piece off a wire coat hanger and use it as a reamer to force through the mouthpiece from the tenon end and/or through the shank from the mortise end. If the blockage is in the mouthpiece, heating the lip and bit region (being careful not to melt it) or the coat hanger piece with a match or lighter can make this task a bit easier. This procedure works best with straight (Apple, Billiard, Dublin, Pot and Bulldog) shapes; less well with curved (Author and Bent.) The Canadian shape is particularly treacherous as the tenon is stepped down and the smaller step is easily broken off. While this does not affect the smoking characteristics of the pipe, it will, of course, reduce its value as a collectible.
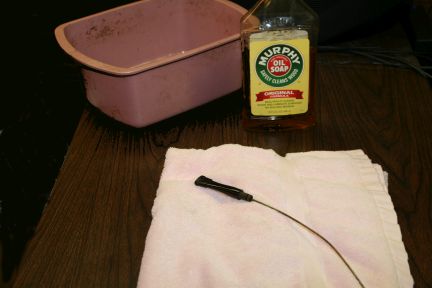
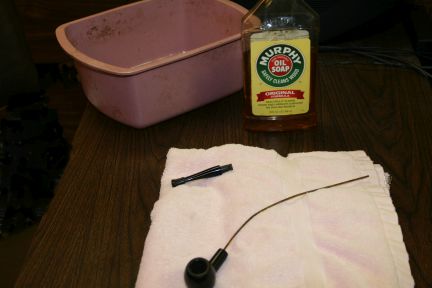
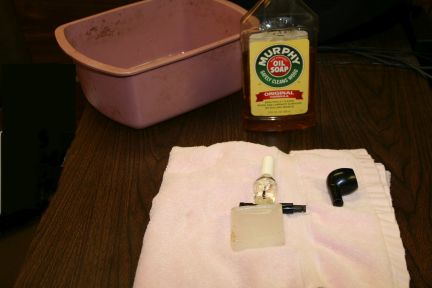
11. Reassemble the pipe. If the tenon no longer properly fits into the mortise:
A. Too loose - coat the tenon with a thin layer of clear nail polish and allow to dry thoroughly before reinserting into the mortise. Repeat as often as necessary to get a snug fit.
B. Too tight—first try rubbing the tenon with paraffin. If that fails, lightly and uniformly sandpaper the tenon. (Use a very fine grit—000 grade or finer) lightly and uniformly around the tenon. Be careful not to overdo it. Keep testing the fit after each few passes with the sandpaper.
FAIR WARNING: Never, ever, under any circumstances, for any reason attempt to adjust the size of the mortise! Trust me on this—disaster awaits!
Again, steps 9, 10, and 11 may well ruin your mouthpiece and replacing it is expensive. Be very careful.
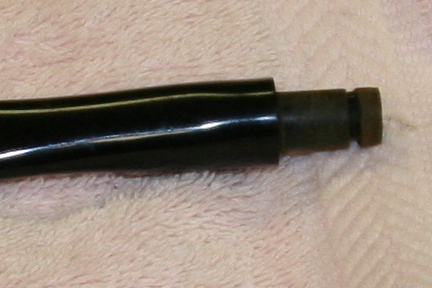
Lastly, I have been asked many times about replacing a damaged or missing o-ring on the mouthpiece. Neither Venturi nor Super-Temp kept records of the specifications or supplier(s) of mouthpieces. For what it's worth, I have never needed to replace an o-ring; the pipes smoke just fine without them. If you are determined, I know only two options: one, buy a box of assorted neoprene o-rings at a hardware store and play with them until you find one that looks about right; two, haunt eBay until a cheap pipe with the same size mouthpiece shows up and swap. There are way too many variables to figure it out: ID, OD, thickness, density, chemical composition, and those are just the ones I can think of.
Good luck and feel free to contact me if you have any other questions or problems cleaning your pipe.